

Kimono step by step guide, page 1: "socks to underwear"
Kimono step by step guide,
page 1: "socks to underwear"
(click here for "kimono to accesoires" portion of the guide)
When putting on a kimono, it would be handy to remember these few suggestions
- If you are able to plan ahead of time, remove your folded garment from its storage envelope (tatoushi) and allow it to hang on an emonkake (Japanese style kimono hanger) for about two days before the event is to take place. This will allow time for the smell to dissipate if you used mothballs during storage.
- Hanging the kimono for airing in advance is also a perfect time to check for dirt, stains and unwanted folds. Better to see these problems early then at the latest second when it's too late to correct.
- Brush the garment with a soft clothes brush (along the grain of the fabric) and use a lint remover to take care of any static problems. If there are any really major fold lines remaining after a day, gently steam them out.
- Wash your hands before handling or putting on a kimono, haori or obi, especially when handling silk items.
- A clean neck, arms, feet and entire body is advisable before putting on a kimono.
- It is customary to carry a handkerchief while wearing such traditional Japanese garments. This handkerchief can help one avoid touching a kimono directly, spreading over one's lap while eating or to wipe stains from the kimono or hands. Carry it in a bag or in the right sleeve pocket of the kimono (left if it has become dirty)
- Do not even attempt to cook / get close to oil. The oil will find your kimono ! (sighs deeply)
- Consider wearing a raincoat and water repellant socks (tabicover) in inclement weather. A good umbrella/kasa usually does a good job also.
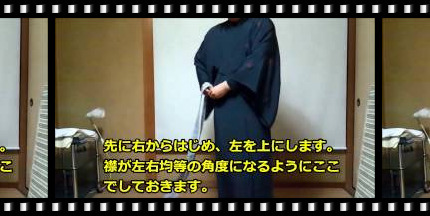
- When putting on the underkimono, kimono and hoari coat it is custom to start with the right hand entering the sleeve. Same for the hakama, start entering with the right foot, though no-one is going to notice when you start with the left side first ;)
And now the step by step guide for wearing a Kimono

Tabi / Socks
First , put on the socks (tabi) because it will be rather cumbersome to put them on later without messing up your kimono and obi.
The standard/traditional color for men is black or white, for the festival moments there is a wide arrangement of coloured and patterned tabi. You can take your chances with a pop tabi if you want to be real hip.
For weddings and official gatherings like a tea ceremony it seems to be white, definitely black for mourning. If by chance you want to walk on dusty roads visiting shrines you could consider wearing black, dirt is less visible on black socks than on white socks.
Many different quality versions and material use of tabi are available, please choose carefully.
 Black tabi
 White tabi
 Festival tabi
 Pop tabi
 String tabi
Some quick extra information:
- Tabi have 4 or 5 kohaze (clamps) or none, default choice would be 4 clamps for a traditional outfit.
- Tabi are available with regular lining (all seasons), with no lining (good for summer), or with three layers (for winter).
- When it's raining outside you can consider putting on a water-repellent tabi cover.
- When it is cold and you have only a regular lined tabi you can use an "inner sock" to get those feet warm.
- Black tabi have versions with white or black soles.
- Put a ruler on the floor with the 1cm part against the wall and make the ruler point away from the wall.
- Stand up straight on top the ruler with your back against that same wall.
- Take a measurement at the front-most point of your foot. (Multiply measurements in inches by 2.54 to find your length in centimeters)
- And we have got the Japanese shoe size... makes you wonder who is being complex about shoe/sock sizes
Shoe/Tabi size chart (for men!)
| Japanese | US | UK | EU | Japanese | US | UK | EU | |
|---|---|---|---|---|---|---|---|---|
| 23 | 5 | 4 | 37 | 27.5 | 9.5 | 8.5 | 42.5 | |
| 23.5 | 5.5 | 4.5 | 37.5 | 28 | 10 | 9 | 43 | |
| 24 | 6 | 5 | 38 | 28.5 | 10.5 | 9.5 | 44 | |
| 24.5 | 6.5 | 5.5 | 38.57 | 29 | 11 | 10 | 44.5 | |
| 25 | 7 | 6 | 39.5 | 29.5 | 11.5 | 10.5 | 45 | |
| 25.5 | 7.5 | 6.5 | 40 | 30 | 12 | 11 | 45.5 | |
| 26 | 8 | 7 | 40.5 | 31 | 13 | 12 | 46.5 | |
| 26.5 | 8.5 | 7.5 | 41.5 | 32 | 14 | 13 | 48 | |
| 27 | 9 | 8 | 42 |
| Japanese | US | UK | EU |
|---|---|---|---|
| 23 | 5 | 4 | 37 |
| 23.5 | 5.5 | 4.5 | 37.5 |
| 24 | 6 | 5 | 38 |
| 24.5 | 6.5 | 5.5 | 38.57 |
| 25 | 7 | 6 | 39.5 |
| 25.5 | 7.5 | 6.5 | 40 |
| 26 | 8 | 7 | 40.5 |
| 26.5 | 8.5 | 7.5 | 41.5 |
| 27 | 9 | 8 | 42 |
| 27.5 | 9.5 | 8.5 | 42.5 |
| 28 | 10 | 9 | 43 |
| 28.5 | 10.5 | 9.5 | 44 |
| 29 | 11 | 10 | 44.5 |
| 29.5 | 11.5 | 10.5 | 45 |
| 30 | 12 | 11 | 45.5 |
| 31 | 13 | 12 | 46.5 |
| 32 | 14 | 13 | 48 |
Putting on a tabi isn't that hard but as explained below there is a standard procedure for how to put them on.
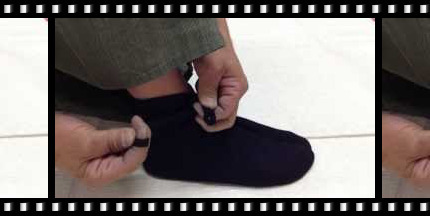
 Wrap half of the tabi to the front so you get an easy way in for your feet.
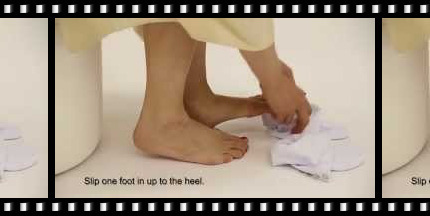
 Put a foot into the tabi and pull so that the toes go firmly to the tip.
 Pull slowly and firmly pulling the wrapped part back to the heel.
 Pull a little bit up and fasten the clasps from the bottom up.
Wrap half of the tabi to the front so you get an easy way in for your feet.
Put a foot into the tabi and pull so that the toes go firmly to the tip.
Pull slowly and firmly pulling the wrapped part back to the heel.
Pull a little bit up and fasten the clasps from the bottom up.
Pull a little bit up and fasten the clasps from the bottom up.
Wrap half of the tabi to the front so you get an easy way in for your feet.
Put a foot into the tabi and pull so that the toes go firmly to the tip.
Pull slowly and firmly pulling the wrapped part back to the heel.
Pull a little bit up and fasten the clasps from the bottom up.
The original Japanese page where above image-set came from can be found at Rakuten Kimono Cafe
Underwear
There are different kinds of kimono underwear too choose from. You can wear a hada-juban or a separate undergarment for the upper body (han-juban) and a (momohiki, fundoshi, susoyoke or suteteko) for the lower body.
A t-shirt with a V-shape neck and Long Johns or shorts can be used as a substitute.
What underwear you choose is a matter of personal taste, comfort and availability of the item in question but whatever you choose, try to make the contact of your skin with the outer kimono or naga-juban as little as possible to prevent sweat reaching the (silk) garments.
Hadajuban

Han-juban with susoyoke

Han-juban t-shirt

V-Shaped neck t-shirt

Momohiki

Fundoshi

Suteteko
Hadajuban
Han-juban with susoyoke
Han-juban t-shirt
V-Shaped neck t-shirt
Momohiki
Fundoshi
Suteteko
Fundoshi (for the hardcore)
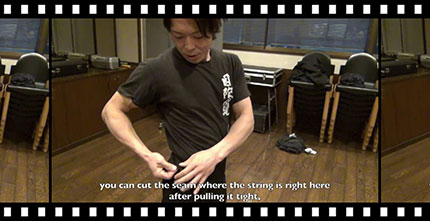
(Optional) How to put on a fundoshi instead of briefs, for the real hardcore wearer.


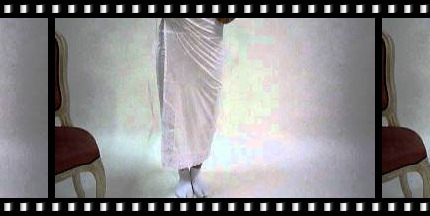
Susoyoke
One of the options for long underwear is a susoyoke, a wrap-around half slip, from a single piece of cloth with ties at the waist.
If you are not in the possession of a susoyoke then a long john or other long underwear is a logical alternative. Our legs also sweat, we don't want that to be transferred to the inner kimono/nagajuban.
Personally I find this option very comfortable and very easy to make yourself (made mine from bamboo cloth)


The original Japanese page where these images came from can be found at 男のきもの大全
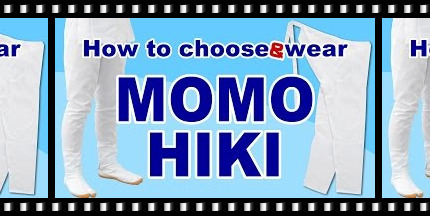
Momohiki
Another option for long underwear is a momohiki (light trousers). Haven't had the pleasure of trying this on yet and not much information found.
Click on the images for a larger version.


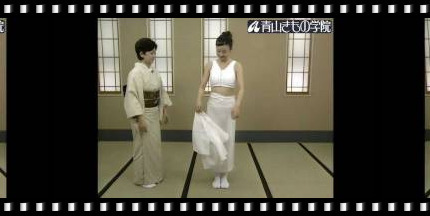
Padding
Make that body a cylindrical shape, so it is said to women wearing a kimono, for men the 'rules' are a bit different.
Men’s obi are tied lower on the waist, and are encouraged to create a sort of 'pot belly' shape. If no natural belly shape is present then by wearing a special yukata pad or towel for that rounder belly shape.
Personally i have never used a towel, not even during the wedding or photo shoots. Probably at those times my belly was big enough to compensate for the lack of a towel -_-"
Wrapping a towel around the upper part of the pelvis is called "hasei o suru", 補正をする.
I think that it is a particularly nice point for men that the stomach which becomes a weak point in western clothes becomes a big merit in kimono.

The place of the towel

The obi is pulled down in front
and up in the back
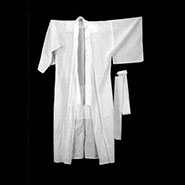
Nagajuban (under kimono)
Next put on the naga-juban (under kimono) which is a kind of wafuku undergarment worn with kimonos under the main outer garment. These garments can have wonderful sceneries on the back though please do not show the naga-juban in public.
Wrap the naga-juban left over right and use a ribbon (Koshi-himo) to tie the naga-juban.
Like the kimono you also wrap the nagajuban always with the left side over the right.

Nagajuban with scenery
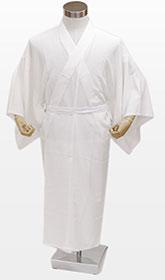
Plain white nagajuban

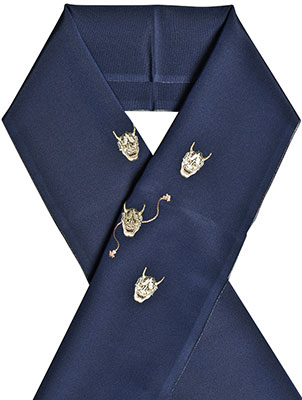
Han-Eri
Han-eri, a long piece of cloth at the neck to avoid getting the juban/underkimono collar dirty.
You will notice that most of the second hand/vintage juban's that are for sale there is a han-eri attached at the neck part. A Han-eri can be loosely attached to the collar to change color composition of the kimono outfit and also makes washing easier when the hada-juban is made of silk by making it possible to wash the Han-eri. A Han-eri is put over the original neck collar and replacing it, a date-eri (see below) adds an extra collar so you can omit the juban.


Eri-pin
Eri-Pin,a presumable easy way to temporarily and quickly attach an han-eri.
On a hot day when you don't feel like it or just haven't got the time to sew on a haneri on your nagajuban, enter the eri pin. A handy contraption to clip the haneri or dateeri to your garment. Fast, cheap and easy.


Date-Eri
Date-eri, using this fake collar attached to the kimono to avoid wearing a juban/underwear during the hot summer days.


Date-eri (also known as Eri Sugata) is a detachable collar matching the obi or accessories. It gives the impression that the kimono consists of several layers, although the extra fake layer rarely appears at the sleeve openings or hem of the kimono. Particularly in summer, layers of kimono can be very hot; as the edge of the collar of the naga-juban can be seen at the edge of the outer kimono's collar; a date-eri stitched to the collar of the outer kimono gives the impression of a naga-juban beneath, allowing the wearer to omit the naga-juban, in order to stay cooler.
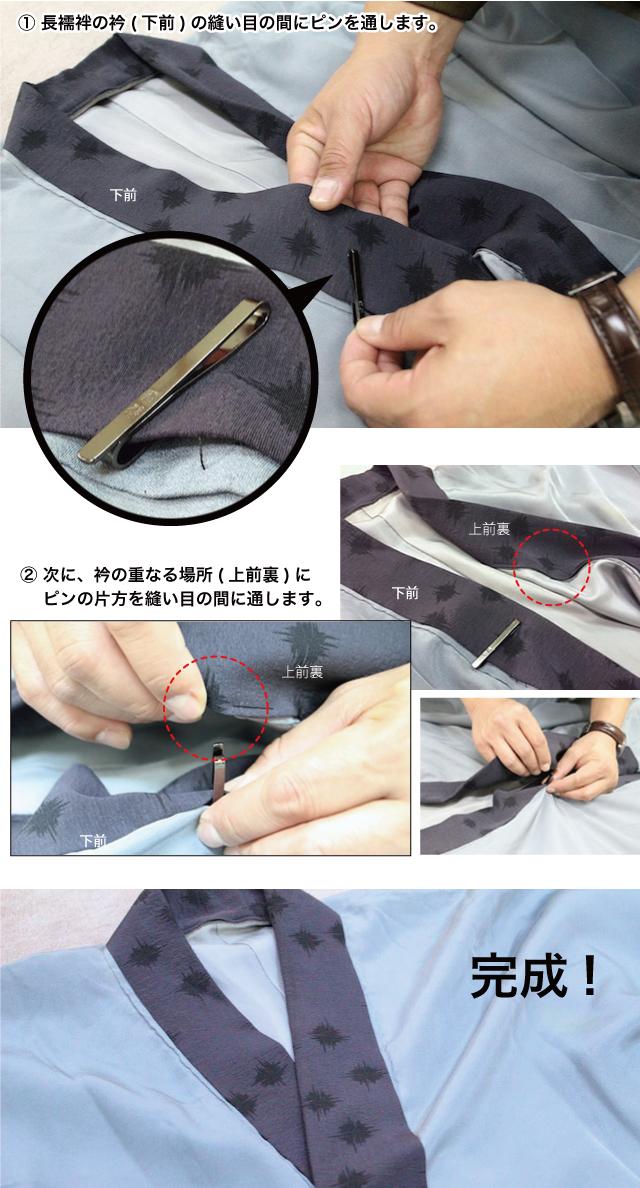
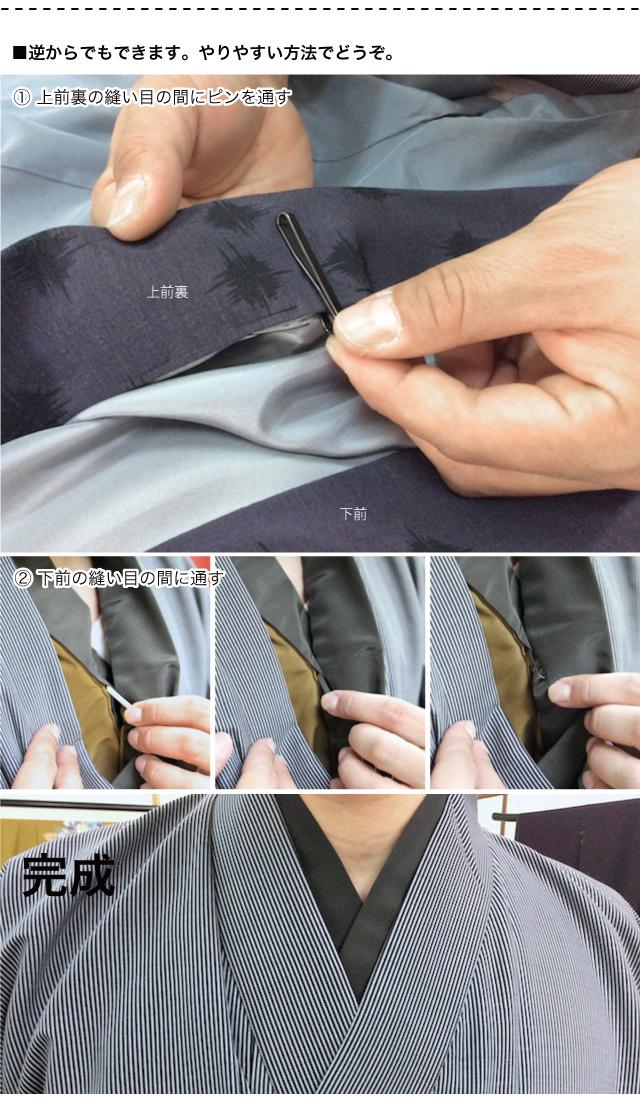
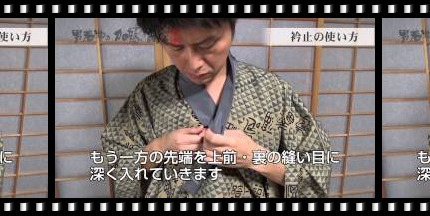
Eri-dome
Eri-dome, keeping your neck part a perfect fit.
Does the gap at your neck of your kimono keeps getting wider each time ?
Then an eridome is the solution. This a metal S-shaped collar clip to hold the upper eri in place on both nagajuban and kimono.


Click on below images to get a somewhat better view of the instructions.